

Havasupai 2025 Packing List (Ultralight & Flying In!)
December 23, 2024
Looking for the best packing list for backpacking Havasupai, everything you need and nothing you don’t? I finished backpacking the Havasu Falls Trail in March 2024, and this is your ultimate Havasupai packing list with tips for beginner backpackers.
Why this blog? Hi there! My name is Maddy and I’ve been working as an outdoor wilderness guide and writer since 2018! All of this gear is tested and true, and this exact setup has been tested multiple times. This is my recommended semi-ultralight setup that works everywhere from the desert, to cold weather backpacking in Northern Minnesota.
Note: this blog uses affiliate links. That means if you choose to make a purchase, I make a small kickback at no additional cost to you.

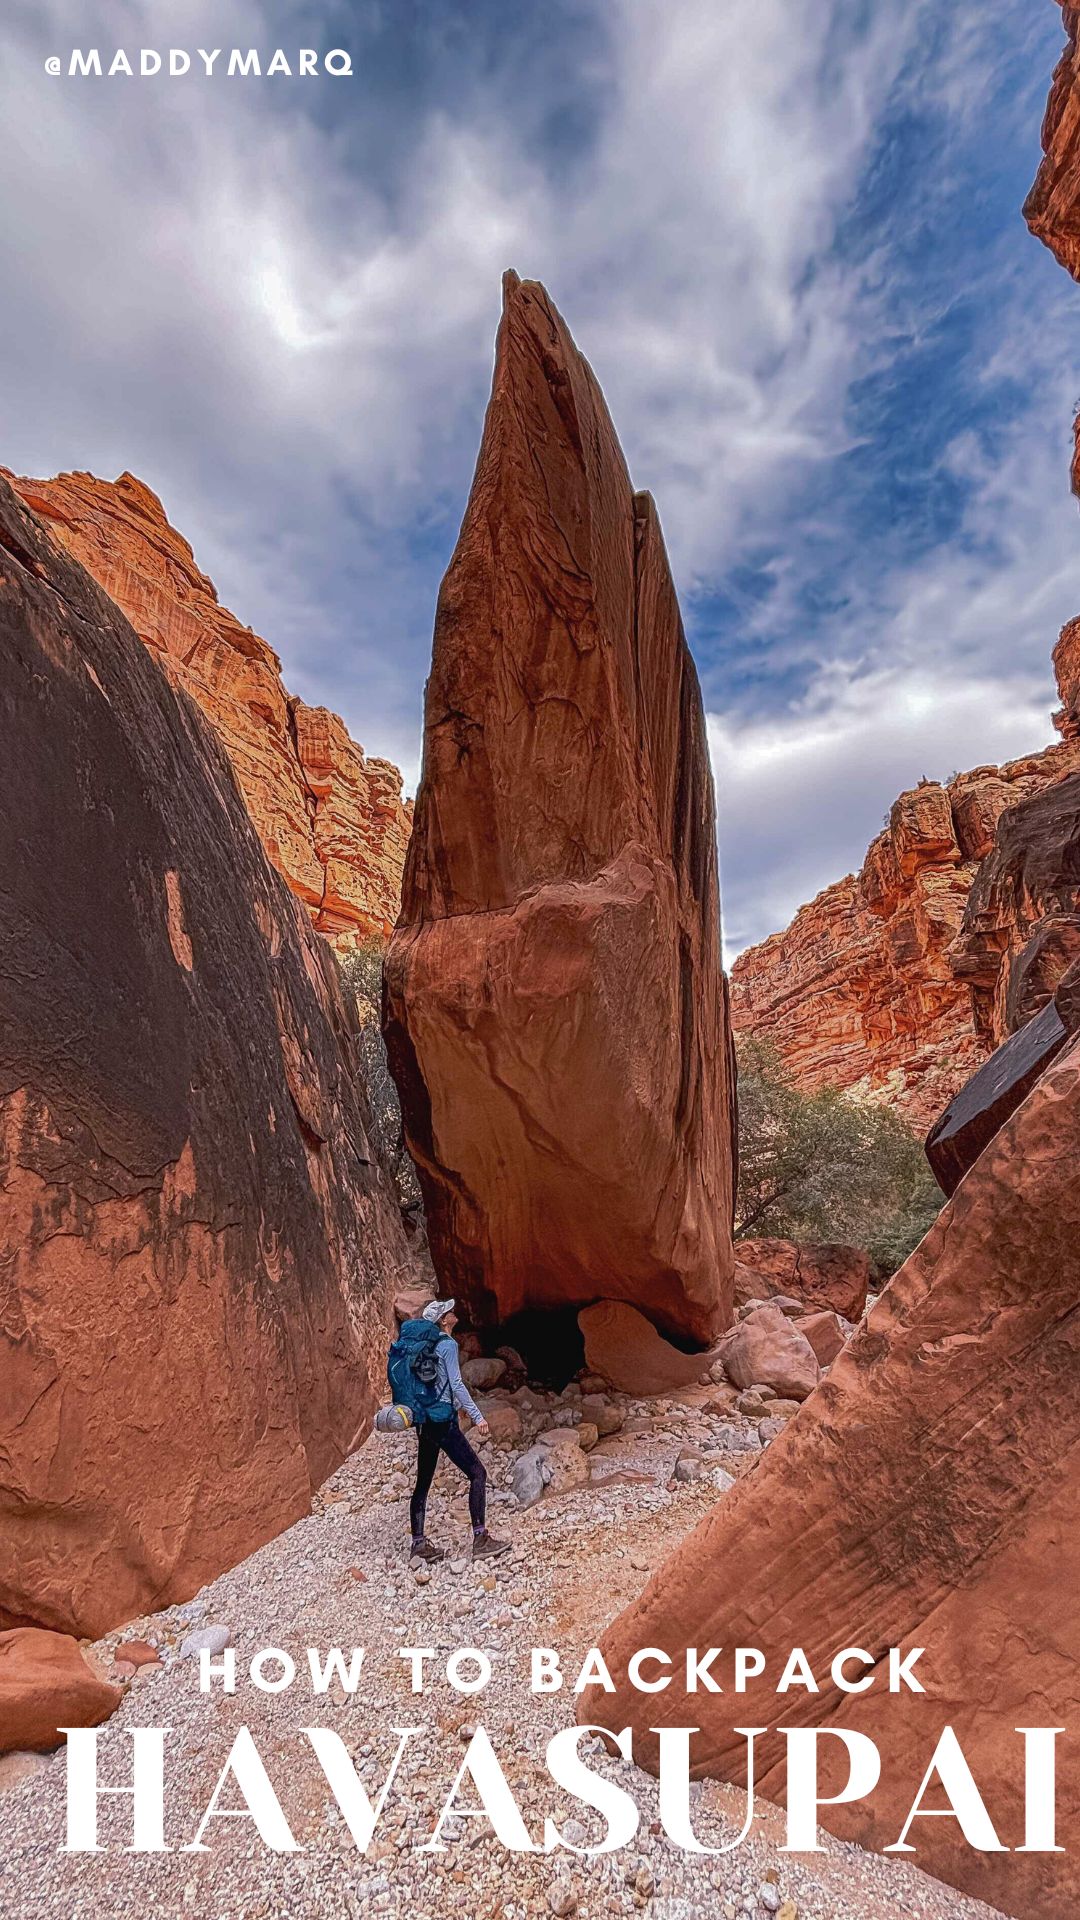
check out that itty bitty swimmer!!
Packing List for 2-3 Night Havasupai Backpacking Trip:
The key to backpacking Havasupai is to bring everything you need, and nothing you don’t! Weight adds up quickly, and odds are you won’t even use that hairbrush, deodorant, or life-straw. My favorite part of backpacking is really fully realizing exactly how little I need to live & thrive.
For backpacking Havasupai in Arizona, keep in mind that the trail begins with 10 miles of downhill. With a pack, this downhill will be harder on your body than the uphill section. Plan to take breaks, and tape your feet for blisters before you begin hiking. I can’t emphasize this enough, but less really is more. On our hike out, we saw several groups with children and severely overpacked backpacks struggling to the point where it seemed unlikely they would make it into the campground before dark. While Havasupai isn’t necessarily a trip you need to train for, a moderate level of physical fitness is a must to carry your gear 10 miles into and out of the canyon.
What Backpacking Gear can I bring on an Airplane?
If you’re flying in and just bringing the essentials, you’re good to go as a carry on! Double check that your tent stakes aren’t sharp edged, and note that some TSA agents might give you a hard time about tent poles. Personally, I prefer to check my backpacking bag inside a 90L duffle when flying.
You CAN bring a camp stove in a carry-on as long as it is clean. You CANNOT bring camp stove fuel, even checked. You can bring trekking poles, but only checked.
where should i fly in to backpack Havasupai?
Vegas is the closest airport! Rent a car and drive from here. You can also rent backpacking gear to hike Havasupai from Basecamp Outdoor Gear Rental in Las Vegas. Check out their Havasupai specific packages here.


Sleep System for 2-3 Nights of Backpacking Havasupai, AZ:
Keep at mind that the Havasupai hike is in the desert; this means that the nights will be much colder than the day time.
- Nemo Disco Sleeping Bag (if shoulder season UL Enlightened Equipment 0 degree quilt)
- Nemo Tensor Sleeping Pad (changed over from Big Agnes bc this one is equally comfortable comparably priced and packs down much smaller
- Waterproof Sea to Summit Compression sack for Sleeping Bag; compression sacks can be a lifesaver and allow you to fit a lot more gear than you might expect.
- Big Agnes Fly Creek 2 UL + footprint [best budget solo backpacking tent: Eureka Midori 1 at
$140$112.49 ] - Headlamp
Where can I get accurate weather for Havasupai?
You can find the forecast for the nearby Havasupai Gardens Campground here. This forecast will be accurate and similar to what you will experience in the canyon, but expect the Havasu Falls campground to be warmer to the tune of 10 degrees F or so. Wind and weather forecasts will be similar.


Kitchen Gear 1-2 People, Havasupai Backpacking Trip:
- MSR camp stove
- Sea to Summit Collapsable Dish-wear
- 2 Smartwater water bottles empty (even a Nalgene can add weight. Definitely leave your metal Stanley at home, that adds lots of weight!)
- Sawyer Squeeze water filter (alt: iodine tablets) NOTE: I drank straight from Fern Spring at Havasupai. There is no need to filter water unless you have an extremely sensitive stomach.
- Spork (long enough to reach bottom of dehydrated meals while keeping your hand clean ideally)
- Tin mug if coffee drinker
- If with a group and making meals from scratch, Nalgene bowl to eat from. If not, straight from the bag
- Urssack for critter proofing. At the Havasupai campground I did hear reports of folks getting food stolen by raccoons in the night.

Food for Havasupai Backpacking Trip:
Getting enough food as you’re backpacking is really important. DO NOT just pack ramen and oatmeal to eat for days straight. You will be uncomfortable, and it can even be dangerous.
In general, budget one breakfast, one lunch, one snack, one dinner, and one dessert for a day. Personally, depending on the trip, I will either purchase pe-packed meals in advance, or dehydrate my own meals in advance.
If you will be backpacking longer than a few days or long distances (greater than 15 miles a day), I recommend coming up with a nutrition plan. I am not a nutritionist, but here are a few resources that are a good place to start:
Personally, I’ve found for me that two oatmeal packets with peanut butter works for breakfast, followed by mid-morning Cliff Bar, followed by a PB&J M&M tortilla wrap for lunch. For dinner, I’ll have a dehydrated camp meal, often lentils and rice, pasta, or beans and rice, wrapped in a tortilla. Usually I’ll have a dessert handy if I’m still hungry! Sometimes I’ll go through a second Cliff Bar at some point in the day.
Pack more food than you think, and pick meals you know you will like. Those dehydrated meals at REI are not a fun thing to mess around with on a backpacking trip. Anything you don’t like and can’t finish you’ll have to pack out, and it will be much heavier now that it’s rehydrated. If you like pasta, just get pasta.
Note that at Havasupai you might want to forgo packing lunch and grab fry bread in the Supai town instead, just outside of the campground.
Electronics to pack for Backpacking Havasupai:
- One external battery pack for phone (I usually bring a pretty beefy battery like this one!)
- Garmin InReach
- Canon Rebel SL3 (the most accident-proof budget-friendly camera out there; I have licensed photos to big magazines and tourism boards from this camera) + SD card + spare battery
- Cell phone

Clothes to pack for 2-3 Nights Backpacking Havasupai:
- Down Puffy jacket: highly packable, you want something that will pack down to nothing but add a lot of warmth at night.
- 2 pairs of Darn Tough Socks (1 pair worn on hike down, one for sleeping. I wore sandals the entire time at camp)
- 4 pairs of underwear
- 1 pair of quick dry shorts
- One pair of long underwear (or just leggings that already have holes in them), sometimes worn, sometimes packed
- Hiking pants (any of these depending on temperature), worn not packed. Good for sun protection and keeping legs safe from rocks while hiking.
- 1 long sleeve wool baselayers top to wear, one to pack. I like Smartwool, it’s consistently had the most longevity of any baselayer I own. Some people just bring one baselayers; I sweat a lot and know that I get cold sitting in my wet baselayer at camp so I’ll usually bring a spare and sleep on top of the sweat wet one to dry it out by morning.
- One fleece pullover, thin weight
- Hiking Boot (worn). I’ve had my Oboz Bridger Mid’s for three years now and put over 1200 miles on them, still in great shape.
- Hiking Sandals for camp (alt: crocs). I recommend a good pair of hiking sandals; if you get blisters on the way in you can hike in these instead to give your feet a break.
- Thin wool gloves. Almost never regret packing these! We hiked in late March and it snowed on the way out.
- Raincoat & Rain pants (see flash flood note!)
- Raincover for Pack
- Compression Sack for clothes
READ: Best Women’s Hiking Boots (how to choose the right boot for you)


Flash Flood and Rain Risk in Havasupai:
If you’re planning on backpacking Havasupai, you have probably seen videos of the brown falls and flash flood evacuation.
FAQ: When do I need to worry about flash flooding in Havasupai?
A little bit of rain in the forecast does NOT mean Havasupai and the campground will flash flood! The Rangers down in the canyon are very helpful and are monitoring to make sure everyone is safe, so rest easy. If there is a risk, they will help evacuate the campground. That said, keep in mind that rain elsewhere in the watershed can cause flash flooding, and all hiking is done at your own risk. Rain in the forecast does not necessarily mean you should cancel your Havasupai trip, but definitely hike with care. If there is rain at all in the forecast, don’t make the trek to Beaver Falls and hang out at the upper falls instead!
While we were there, it rained and sleeted overnight, but we still woke up to beautiful blue waterfalls!
What happened with the 2024 Havasupai Flash Flood?
In August 2024 Supai and the Havasu Falls Trail experienced a flash flood. The campground is reopening for 2025; read more about reservations here.
The 2024 flooding in Havasupai was devastating to the local community. While most locals and visitors alike made it out, one backpacker hiking to Beaver Falls did not. This video of the timeline is a helpful resource to help you prepare for what a flash flood in the canyon can look like. In the grand scheme of national parks, Havasupai has extremely few fatalities.
Big takeaways: a trip down to Beaver Falls is a big risk, rain in the forecast or not. If there is rain in the forecast, do not go. Even if there is not rain in the forecast, understand that this hike entails additional risk. The rangers present are on it and evacuations happen in a timely manner. Rest assured that everyone is doing their best to look out for you.
Best Backpacking Bags for Havasupai:
- For lightweight trips like Havasupai, I use the Granite Gear Perimeter 35L [discontinued; closest match Crown 40]
- I’ve also used the Osprey Renn 50 and will use the Osprey Aura 65 for trips longer than one week with no resupply options. To be honest though, I really prefer the Granite Gear barebones setup and find it to be more comfortable than all of the features on the Osprey Bags. For backpacking Havasupai because of the length, heat, and incline/decline, I recommend going as lightweight as possible

MISC Gear for Backpacking Havasupai:
- First Aid Kit
- Emergency Bivvy (Keep in a pocket accessible without removing your backpack. If you fall and break something and cannot easily move, this will make it easier to last a night. I have only ever used my emergency bivvys when helping strangers, but it has never not been worth bringing on the off chance I can help someone in trouble.
- Maps
- Compass
- Signalling Mirror
- Trekking Poles *I did not bring trekking poles because I flew out, and you cannot bring trekking poles in a carryon. In the future, I’ll check my backpacking bag inside of a duffle and bring the trekking poles and bring them.
- UL repair kit (tent split covered in duct tape and noso patch or two)
- Pillow (meh, often I do not bring and did not this time)
- Hand sani, toothbrush, sunglasses
- Binoculars (if room only; definitely worth it on this hike)
- Sunscreen
- Kula Cloth
- Water drom; depending on where you camp it’s a decent walk from the campground to the spring.
Backpacking First Aid Kit Note:
You can purchase a first aid kit from REI prepackaged, but I like to build out my own for my own specific backpacking needs. I blister easily, and for me preventative blister care is super important.
This looks like cutting my toenails before trips, duct taping or KT taping over the parts of my feet that blister before I start hiking, and the second I start to feel a hotspot, I take off my hiking boot and use Glacial Gel patches and KT Tape to cover the spot before it becomes a blister.
It is far better to stop hiking and tend to your blisters early than to try and patch up an open wound. For me, I know that on long downhill sections I blister on my pinky toe and the outer edge of my foot, so I slap some duct tape on the usual spots before hiking so it doesn’t rub. On uphills, I blister at my heels, so I do the same.
The most common backpacking injuries tend to be blisters, dehydration, and burns from camp stoves. I come prepared for this by having a burn kit, rehydration packs, and practicing preventative First Aid by staying hydrated, preventing blisters, and being conscious of boiling water and camp stoves (ie, don’t let someone pour freshly boiled water into your coffee cup while you’re holding it!!)

Things to NOT bring Backpacking Havasupai:
- Soap! There is no such thing as truly eco friendly soap. Use the dirt to cut the grease and rinse, you’ll be fine.
- Pillow! My puffy jacket works just as well as a pillow as most of the lightweight camp pillows (okay i still usually bring my camp pillow)
- Pack towel! I just never use it, and you want to cut AS much weight as possible for this one
- Deodorant. I find caking layers of deodorant on myself while backpacking to actually be way more gross than just doing it once before hitting the trail, then not again until I’m done and showering.
- Extra down blanket. Your sleeping bag can unzip neatly into a blanket! There is no reason to bring both a sleeping bag and a down blanket.
- Hairbrush. A French braid and finger combing got me through 70 days of sea kayak camping. After that, no way am I carrying that weight.
- The containers things came in. I don’t bring the bag my tent came in— I stuff it loose into my pack to save weight. I don’t bring a container for my utensils, or extra packaging, or any extra snitch or stuff sacks beyond the compression sacks listed above. Every single extra thing that you bring adds weight, and every nonessential thing becomes something you’re likely to leave behind.
- Alcohol. Alcohol is ILLEGAL on Havasupai Land.
Other things to bring backpacking Havasupai:
- A small day pack. I brought one of these when backpacking Havasupai and base-camping, and it made day hiking very nice!
- Trekking Poles. The older I get, the more I use these. That said, if I’m flying to get to a backpacking destination, I pretty much never bring them.
- Sleeping Bag Liner. SO! A sleeping bag liner. Personally, I almost never feel like they actually add any warmth, no more than a hot Nalgene would. That said, they can do a lot for the longevity of your sleeping bag, keeping a down bag clean from the oils on your skin. In general, I ditch the liner unless I am bringing a bigger pack.
- Wet wipes. This really depends on my mood. If I’m on my period backpacking, I almost always bring them. Really improves my quality of life.
- Map & Compass: I far prefer to navigate by paper map and compass than by electronic app! That said, realistically many popular backpacking trails do not require a map and compass. Be aware of what you personally need to navigate in the area you’re travelling.
- Permits! Hiking Havasupai requires permits. Look here for reservation; you may be able to find last minute cancellations. In 2024, Havasupai permits cost $455 per person for three nights of camping. You’ll need to check in the day before or after 8am the day of your hike at Grand Canyon Caverns Inn. I recommend just staying here the night before.

Is Hiking Havasupai worth the Price?
Is backpacking Havasupai worth the $455 permit price?
In my opinion, totally! This hike is beautiful, the trail is so fun, the waterfalls are awesome, and it’s a once in a lifetime backpacking destination.
Keep in mind that the hike itself is on Havasupai Nation Land, and you are a guest on this trail. The town of Supai, home to 500 Havasupai people, Indigenous to the Grand Canyon but forcibly removed in the 1920s by the National Park Service, is located 8 miles into the canyon, and sees 30,000 visitors a year!
One awesome fact about the Havasupai is that Havasupai language is still their first language!
It’s an absolute privilege to visit Havasu Canyon, and the $450 permit is what it costs for the hike to support the town of Supai and to make tourism possible in such a remote area.
looking for a detailed guide to how to backpack Havasupai? I’ve got you covered! Here’s a detailed guide to how to get permits, logistics, how hard the hike is, where to camp, and more!
Other Beginner hiking and outdoor guides:
- Check out a beginner’s guide to sea kayak camping
- Plan another desert spring break from Vegas!
- Outdoor gear is expensive! Here’s a guide to buying used outdoor gear!
- Here are all the best, most flattering hiking pants for women!